

How to Avoid Common Screeding Mistakes
Expert Tips for a Flawless Finish
Screeding can be a tricky business. Whether you’re an experienced DIYer or a developer tackling a large-scale project, you’ve probably heard, or have horror stories of your own to tell, about cracked, uneven, or shrinking screed floors. The good news is that many of these common screeding problems can be completely avoided with a little know-how.
At Buxton Flow Screeds, we’ve been installing high-quality screed for over a decade, and we’ve seen it all. From residential renovations to major commercial projects, our experience has taught us how to avoid common screeding mistakes. So, if you’re ready to get your screeding project right the first time, keep reading for our 5 expert screeding tips.
Tip 1 – Subfloor Preparation
Poor or hurried surface prep is a major cause of screeding headaches. If your base layer isn’t level and clean, your screed won’t be either, leading to cracks, unevenness, and potential problems with your final floor finish.
- The Fix – Before you even think about mixing your screed, take the time to thoroughly prepare your subfloor:
- Clean – Start with a spotless surface. Thoroughly sweep or vacuum to remove all dust, debris, and loose particles. Any leftover bits can interfere with the screed’s bond and create an uneven finish.
- Level – Use a laser level to accurately measure the floor’s height at various points and identify any significant dips or bumps. For minor imperfections, a self-levelling compound can create a perfectly flat surface. If you’re dealing with major variations, you might need to address the underlying subfloor before proceeding.
- Prime – If you’re screeding directly onto concrete, it’s a good idea to apply a primer. This creates a better bond between the concrete and the screed, preventing future issues with adhesion and moisture.
Tip 2 – Get the Mixing Right
Getting the consistency of your screed mix right is crucial. Inadequate mixing is a common cause of weak or uneven floors. If your screed isn’t properly blended, the materials don’t bind correctly, leading to weak spots, cracks, and even delamination.
- The Fix – Always, always, always follow the manufacturer’s instructions to the letter. They’ve done their research, and they know the exact mixing time and technique required for their product. Invest in a good quality forced-action mixer to ensure a consistently smooth and homogenous mix.
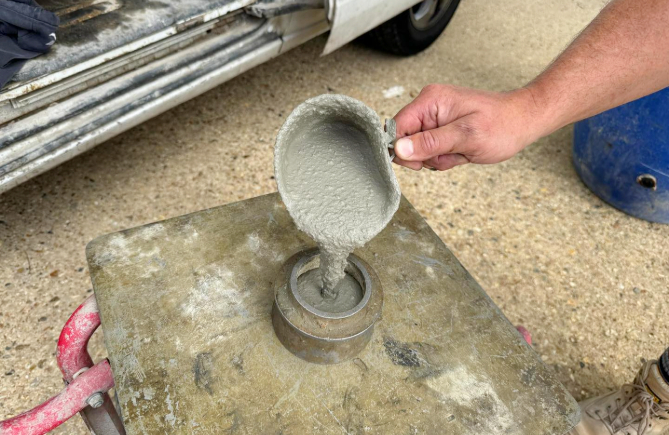
Tip 3 – Keep Moisture at Bay with a DPM
Moisture is the enemy of a long-lasting screed. If you’re working on a ground floor or in an area prone to dampness, a damp proof membrane (DPM) will act as a protective shield against rising damp.
- The Fix – This thin membrane acts as a barrier, preventing moisture from creeping up through the subfloor and causing problems with your screed. Without it, you could face issues like efflorescence (those unsightly white salt deposits) and cracking, which compromise the integrity of your floor.
Tip 4 – The Importance of Curing Time
It’s tempting to rush things along, especially when you’re eager to see your finished floor. But when it comes to screeding, patience is key. Cutting corners on curing and drying times is a recipe for weakness, cracking, and potential long-term issues.
A rushed process can trap moisture within the screed, leading to problems with adhesives, floor coverings, and even mould growth. Insufficient curing also means the screed won’t be as durable, making it more susceptible to cracking and damage over time.
- The Fix – Read the manufacturer’s guidelines for the recommended drying and curing times for the screed you’re using. These recommendations are based on factors like screed depth, ambient temperature, and humidity. Proper curing is an investment in the long-lasting performance of your floor.
Tip 5 – Screed Cracks Are Not Fatal
Of course, it’s alarming to find cracks in your newly dried screed, but it doesn’t mean that the floor is a disaster. Minor hairline cracks are often superficial and won’t affect the overall strength or integrity of your screed. These tiny cracks can occur due to slight shrinkage during the drying process and are usually nothing to worry about.
However, larger or deeper cracks might signal a more serious issue and should be dealt with.
- The Fix:
- Assess – First, how bad are the cracks? Are they hairline cracks or something more substantial?
- Repair – For minor cracks, you might not need to do anything at all. For larger cracks, you can use a suitable repair compound or resin to fill them and create a smooth, level surface.
- Seek advice – If you’re unsure about the severity of the cracks or the best repair method, don’t hesitate to contact Buxton Flow Screeds for advice. We’ll can assess the cracks and recommend the fix you need.
Ready to Screed with Confidence?
We hope this guide has given you the confidence to tackle your next screeding project with the expectation of a flawless floor! By following these expert tips, you can avoid common pitfalls and achieve a smooth, durable, and long-lasting floor.
Need a helping hand? If you’d prefer to leave your screeding project in the hands of experienced professionals, Buxton Flow Screeds is here to help. Contact us today for a free quote and let us take the stress out of screeding – 020 3369 3396/ 07590 625100


