
Liquid Screed Floor Preparation
Building a Sealed Envelope for a Flawless Pour
If you’re here, it’s because you know that liquid screed floor preparation is where a job is won or lost. Most guides tell you to ‘clean the floor’ – we’re going to tell you how to stop ten tonnes of material from disappearing into your subfloor. If you want a dead-level SR2 finish, you have to stop thinking about ‘prep’ and start thinking about ‘tanking’. Here is how to build a watertight envelope for your liquid screed flooring.
Perimeter Strips & Insulation Integrity
If you skimp on your perimeter expansion strips, you’ll have a cracked floor. It’s that simple. Liquid screed expands and contracts with temperature changes – especially where underfloor heating is in the mix.
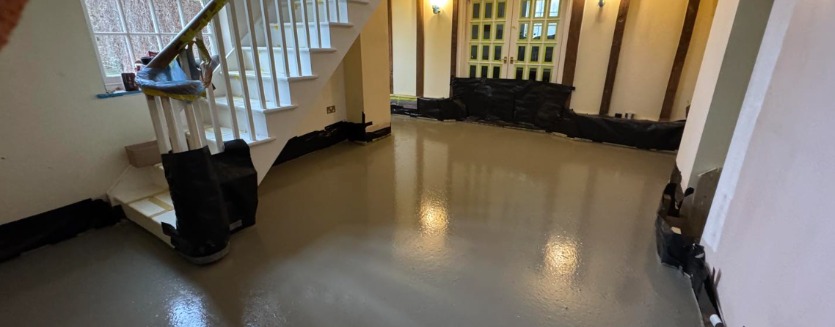
You need 10mm of foam flanking every single wall, pillar, and door frame. Don’t just lean it there – staple or tape it tight to the wall and ensure the skirt sits flat on your membrane. This creates a gasket that allows the floor to breathe. If the screed touches the structural wall, you’ve built a bridge for heat loss and a starting point for a hairline fracture.
The Perimeter Quick-Check
- Coverage – 10mm foam buffer for every single vertical surface.
- Security – Don’t just lean strips; staple or tape them high and tight.
- Watertight Seal – Flatten the skirt against the membrane to complete the tanking envelope.
- The Goal – To create a breathing gasket that stops cracking and thermal bridging.
Locking Down Loops – Managing UFH Pipes
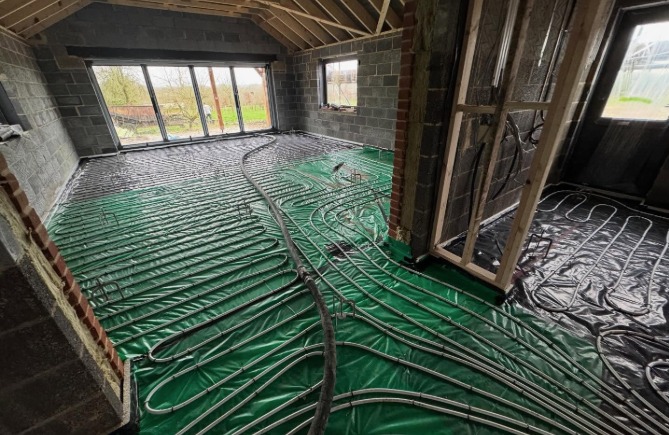
Air stops heat transfer. If a pipe lifts during the pour, it creates an air pocket beneath it. This pocket acts as insulation, stopping your floor from heating up efficiently and wasting your energy budget. To get a high performance system, the pipes must be in total contact with the screed. Use a heavy duty staplegun to drive staples deep into the insulation. If the staple doesn’t bite, the pipe will move.
UFH Pipes Recap
- Mechanical Grip – Use professional clip rails or staples that bite deep into the insulation boards.
- Water-Fill Requirement – Never pour over empty pipes. The weight of the water is what keeps the system stable.
- Void Elimination – Make sure the membrane is dead-flat under the pipes to stop air trapping.
- Over-Clip Bends – Bends are where 90% of buoyancy failures happen. Anchor them hard.
Laitance and Floor Finishes
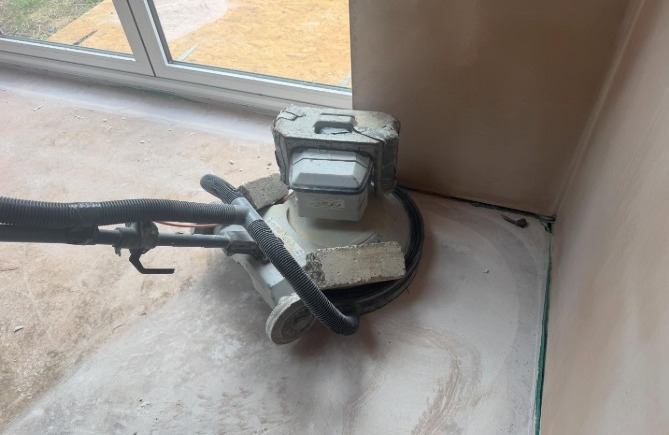
Laitance is the biggest cause of post-install complaints. People pour a beautiful floor, skip the sanding, and then wonder why their expensive LVT is bubbling or their tiles are cracking. You have a choice: either commit to sanding the floor 7 days after we leave, or spec a cement-based screed. Take a look at our laitance removal guide.
Cement-based mixes (like Cemfloor) don’t have this dusty layer. You save on the sanding cost, you save on the mess, and you can get your tiler on site much sooner.
Laitance Check List
- No Sanding = Failure – If you’re using Anhydrite, you must strip the surface skin or the adhesive will fail.
- Vacuum Hard – After sanding, you need an industrial vacuum to get the site super clean.
- Timing is Really Important – If you wait too long (20+ days), the laitance becomes rock-hard and is much harder to remove.
- Spec for Speed – If your project is on a tight deadline, go cement-based to avoid the sanding delay entirely.
Last-Minute Pre-Pour Checks
Our screeders have had to pull the plug on pours at the last minute because of simple fails that could easily have been avoided. If the site isn’t ready, the screed goes to waste and you still get the bill.
Before we arrive, do a final walk-around. Is there debris on the membrane? Is the man-hole cover secure? Are the kitchen legs protected? Liquid screed will find its way into every gap, no matter how tiny. If you haven’t protected your low-level brickwork or finished joinery with tape and plastic, the splashing will leave a permanent stain.
Last Minute Check List
- Vacuum the Membrane – Any bit of wood, grit, or plastic will float to the top and ruin the finish. Get it surgery-clean.
- Protect the Woodwork – Wrap the bottom 200mm of any finished posts or door frames in plastic.
- Verify Levels – Double-check your datum point. Once the liquid is flowing, it’s too late to realise your insulation was 10mm too high.
- Access Route – Make sure the mixer isn’t going to crack your neighbour’s driveway or get bogged down in mud.
Ready for a Dead-Level Finish?
You’ve done the prep; now get the Buxton Flow Screed experts in to finish the job. From tanking advice to the final pour, we are your on-site partners. Start building with a specialist team that values quality screeding.
Get in touch with Buxton Flow Screeds now to book your installation – 020 3369 3396/07590 625100


