
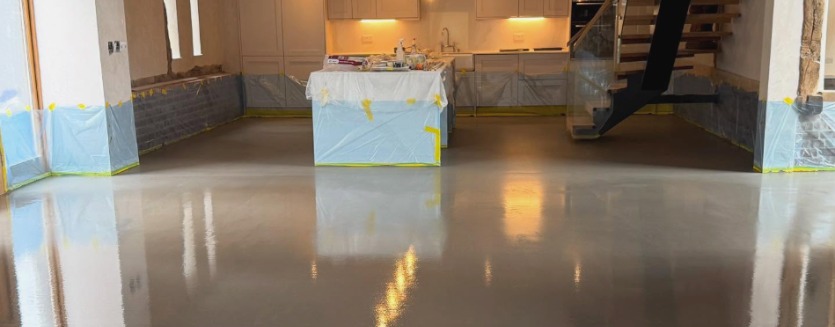
Floor Screed Taking Too Long To Dry?
Still Wet? Why Your Floor Isn’t Drying And How to Fix It
Floor screed taking too long to dry? Most builders blame the mix when a floor won’t cure. Usually, they’re wrong. If you’ve sealed the room tight or ignored the thermometer, you’ve stopped the chemistry from happening. Follow this guide to restart the drying process.
Stalled screed happens, but it’s never a dead end. At Buxton Flow Screeds we’ve tackled every kind of drying delay since we started out 20 years ago. We’re here to give you the trade-level fixes you need to get your installation completed successfully. If your floor isn’t behaving, let’s start by finding out why.
Why Your Screed Won’t Dry – 5 Problems and 5 Solutions
You’re on a deadline, and the floor is holding you up. In which case, you’re not looking for advice; you want a solution that works as soon as. If your liquid screed is refusing to dry, check these five site conditions immediately.
1. The Room is Hermetically Sealed
- The Problem – You’ve kept the windows shut to protect the floor. Now, the air is saturated. Once the air hits 100% humidity, it won’t take any more moisture from the screed.
- The Fix – After the first 48 hours (post pour), open windows at opposite ends of the room. You need to get a constant cross-breeze to flush out the damp air and let the floor breathe.
2. It’s Too Cold for Chemistry
- The Problem – If your site is dropping below 5°C at night, the chemical cure slows to a crawl. Cold air also holds less water than warm air.
- The Fix – Get the heating on. Aim for a steady 15–20°C. If you don’t have a working boiler yet, use electric heaters, but never point them directly at the floor or you’ll cause surface cracks.
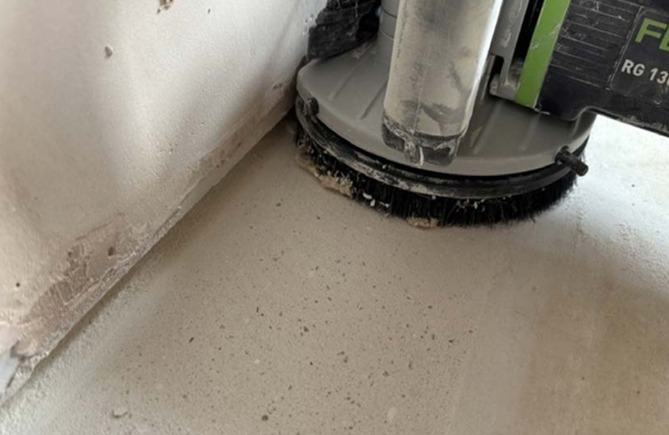
3. You Left the Laitance Intact
- The Problem – Liquid screed often forms a thin, crusty layer on top called laitance. This skin behaves like a lid on a jar, sealing the moisture inside the slab.
- The Fix – Sand the floor 7–10 days after the pour. Removing that top 1–2mm of crust opens up the pores of the screed and can shave weeks off your total drying time.
4. The Slab is Too Thick
- The Problem – If you’ve poured a 70mm slab where you only needed 40mm, you’ve doubled the water volume. Standard dry times go out the window.
- The Fix – Hire a commercial-grade refrigerant dehumidifier. Don’t bother with a small domestic unit; it won’t be able to keep up. Seal the room while the dehumidifier is running to pull moisture directly from the slab.
5. Moisture is Creeping in from Below
- The Problem – If your Damp Proof Membrane (DPM) was punctured or incorrectly taped, you’re not just drying the screed – you’re trying to dry the earth beneath the house.
- The Fix – This requires a specialist moisture test (a Carbide bomb test). If the subfloor is leaking moisture, you may need to apply a surface DPM before laying your final floor finish.
Liquid Screed Application – Your Technical FAQs
Thorough prep is the foundation, and then the pour itself must meet technical standards for a strong floor that will stand the test of time. Liquid screeds are high-performance products that behave differently from traditional sand and cement. Here are the technical questions our installers get asked regularly by builders and renovators before a pour.
‘The floor looks light grey and feels bone-dry. Can I start tiling today?‘
Looking dry and being dry are two different things. Liquid screed dries from the top down. While the surface might look ready, the core of the slab could still be holding 5% moisture. If you tile now, that moisture will get trapped, blow your adhesive, and lift your tiles within six months. Never trust your eyes; always use a hair hygrometer or a carbide bomb test to get a definitive reading below 0.5% (or 75% relative humidity).
‘I’ve got my kitchen being delivered tomorrow. Can I walk on the screed while it’s still curing?‘
Liquid screed can usually take light foot traffic after 24–48 hours, but walking on it isn’t the same as working on it. Bringing in heavy kitchen units or shuffling appliances across a floor that’s still curing will scuff the surface and potentially cause point-loading cracks. If you must have trades in the room, wait at least 7 days and use plywood paths to spread the weight.
‘It’s raining and muggy outside. Should I still keep the windows open for ventilation?’
No. If the outdoor humidity is higher than the indoor humidity, you’d be “watering” your floor with the air. In wet or humid weather, shut the windows tight and switch to a commercial refrigerant dehumidifier. You want to create a closed-loop environment where the machine is the only thing pulling moisture out of the room.
‘Once it is finally dry, do I need to prime it, or can the tiler go straight over it?’
You must prime it. Liquid screed is anhydrous (calcium sulphate based), and most tile adhesives are cement-based. If they touch, a chemical reaction called “ettringite” occurs, which forms a crystal layer that destroys the bond. Once your floor is dry and sanded, use a high-quality acrylic primer to create a barrier. If you don’t, your floor finish will eventually peel off like a sticker.
Trade Experience, Not Trial and Error.
Don’t gamble with your floor finish. Liquid screed is a high-performance material that requires a high-performance team. At Buxton Flow Screeds, we provide a detailed site assessment and a professional install that removes the guesswork from your build.
If you want a perfect floor that’s ready when we say it will be, call us. We’ll get your project across the finish line without the drama – 020 3369 3396 or 07590 625100


