
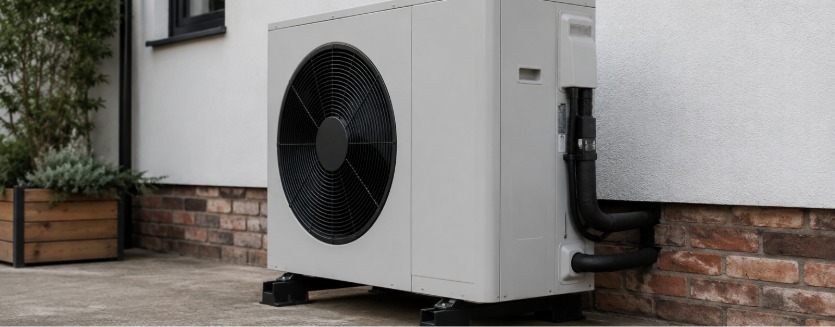
Lower Bills, Faster Heat – Liquid Screed for Heat Pumps
Retrofit Success – Getting the Most Out of Your Heat Pump with Liquid Screed
A heat pump operates at low temperatures, which means that your flooring becomes the heat exchanger. If you have air pockets in your screed, these act like a thermal barrier, forcing your pump to work harder for less output. At Buxton Flow Screeds we recommend liquid screed for heat pumps because its speed and efficiency is hard to beat.
We’ve had 20 years at Buxton Flow Screeds to refine the pour and ensure 100% pipe encapsulation. We guarantee consistent delivery of a flat, high-density thermal mass that responds fast to your thermostat. We know from experience that it’s the liquid screed that makes the heat pump. Stop wasting energy.
Removing Thermal Lag – Liquid Screed Response Times and Low-Temp Operation
Heat pumps are designed to ‘sip’ (rather than ‘glug’) energy at low flow temperatures, around 35°C to 45°C. For this to work, the flooring you choose needs to be capable of a high-performance heat exchange. Traditional dry screeds don’t work for this task: they act more like storage heaters, taking half a day to warm up and then providing heat long after the thermostat clicks off – which is a drain on efficiency.
By contrast, liquid screed delivers:
- Reactive Heating – Liquid screed’s high density and thin profile give you a rapid response. Your flooring will react to your thermostat settings almost instantly, giving you precise control over your climate.
- Lower Flow Temperatures – Because the heat transfer is so efficient, you can drop your heat pump’s flow temperature. Every degree you drop saves approximately 2-3% on your energy bills.
- Dense Thermal Mass – Liquid screed eliminates the air pockets that are characteristic of dry screeds. Its solid, void-free mass holds heat better and releases it evenly across the entire floor finish.
5 (Other) Benefits of Choosing Liquid Screed
One of the biggest concerns about underfloor heating is that the screed will crack as it expands and contracts. If you’re using a dry mix this is a possibility; the mix is brittle so it will struggle with the thermal stresses of a heat pump system. At Buxton Flow Screeds, we use high-strength, anhydrite or cement-based liquid screeds designed to handle thermal movement without threatening the bond to your subfloor.
Five Practical Benefits of Using Liquid Screed:
- Pump-Applied – We pump the mix directly from the truck through a delivery hose, allowing us to pour 150 square metres in under 45 minutes. This reduces site congestion, minimises downtime, and ensures we’re off-site and out of your way fast.
- High Flexural Strength – Liquid screed is stronger and less brittle than traditional mixes. This means we can reduce the thickness without risking structural failure, putting your floor finish immediately closer to the heat source.
- Minimal Shrinkage – Our mix has a much lower shrinkage rate than sand and cement. This means you get a more stable floor with fewer expansion joints to ruin the look of your final finish.
- No Curling – Because the material dries evenly from top to bottom, you don’t get the ‘curling’ or ‘lipping’ at the edges that can occur with sand and cement.
- Optimal Finish – You get a SR2 surface regularity as standard. It’s a flat, level base that’s ready for tiles or engineered wood without the need for excessive levelling compounds.
Post-Pour – Managing Laitance and Moisture
If a contractor tells you that you can tile directly onto fresh screed without preparation, they’re setting you up for a floor failure.
Here’s what you need to be aware of after the pour in complete:
Laitance Removal
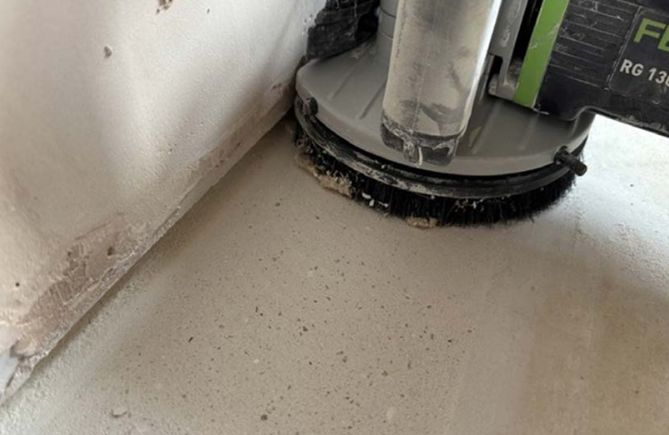
All calcium sulphate screeds produce a weak surface film called laitance, as they dry. We advise on a light sanding 7 to 10 days after the pour to remove it. Here is our guide to best practice for laitance removal.
Moisture Testing
We never guess if a liquid screed floor’s dry and neither should you. Invest in hygrometer testing to ensure the moisture content is below 0.5% (for unbonded finishes) before your floor finish is laid.
The 7-Day Rule
You can commission your underfloor heating after just 7 days to accelerate the drying process. We’ll provide you with the specific ‘heat-up’ schedule to ensure the floor isn’t shocked or cracked.
Heat Pump & Liquid Screed – Your Questions Answered
These FAQs cover the site logistics every renovator and self-builder needs to know when installing a heat pump with liquid screed.
Can I speed up the drying time to get my floor finishes down faster?
Yes, and for heat pump installs, you absolutely should. Once the floor has cured for 7 days, use the heating system to drive moisture to the surface. Pair this with a dehumidifier and good ventilation, and you can significantly reduce the wait. You’ll need to sand the laitance first to let the moisture escape, otherwise you’re just trapping water under the surface.
What is the minimum depth for liquid screed over UFH pipes?
We recommend a minimum cover of 25mm to 30mm over the top of the pipes. This provides enough structural integrity while keeping the thermal mass thin enough for a rapid response time.
When can I walk on the floor after the pour?
Usually, liquid screeds are ready for light foot traffic within 24 to 48 hours.
Can I use any heat pump with flow screed?
Yes. Whether it’s Air Source (ASHP) or Ground Source (GSHP), the physics remain the same. Our liquid screed ensures the energy your pump generates actually reaches the room instead of getting trapped in the floor.
Why Choose Buxton Flow Screeds
At Buxton Flow Screeds, we don’t just pour floors – we engineer thermal heat exchangers. Two decades of site experience has taught us that the right screed doesn’t just save energy – it saves your system from early burnout.
Contact the Buxton team today for a free, no-nonsense quote and a floor that actually performs as promised – 020 3369 3396/07590 625100


