

How to Screed Over An Existing Floor
Guide to Successful Screeding Over an Existing Substrate
No problem with pouring a liquid flow screed directly over an existing concrete slab or tiled floor, but you can’t treat it like a standard installation. To avoid cracking, a bonded calcium sulphate screed requires a minimum depth of 25mm under BS 8204 Part 7, alongside a strict surface assessment. If you want the detailed guide on how to screed over an existing floor, you’ll get the straight site facts right here.
At Buxton Flow Screeds, we have over two decades experience supplying and pumping liquid screeds on commercial and residential sites across the UK. We’re suppliers, but we’re also installers, so this guide is written on the back of our experience to ensure your over-screed stays flat, bonded, and structurally sound.
The Three-Step Substrate Assessment
The first thing you need to do is a physical check of the existing floor. Here are the 3 main issues you’re looking for:
1. Relative Humidity (RH) Testing
Clip a calibrated floor hygrometer to the bare slab to measure moisture vapor transmission. For a direct bonded calcium sulphate flow screed, the reading must sit below 75% RH. If the slab exceeds this and it doesn’t have a damp-proof membrane, stop. You’ll need to either apply a surface liquid epoxy DPM to seal it or switch to an unbonded system using a 1200-gauge polyethylene sheet.
2. Mechanical Soundness and Keying
Use a hammer to tap the entire surface of the floor. A hollow ring means localised delamination; you’ll need to cut out the blown sections and patch them with fast-setting structural repair mortar. Then hot-blast or scabble over the entire area to remove surface laitance and expose the concrete aggregate, which will give you a secure mechanical key.
3. Contamination and Profile Selection
Check the slab for deep oil stains, fuel spills, or old bitumen residue. If any of these have penetrated the concrete pores, chemical primers will fail, causing the screed to crack under point loads. If the contamination is permanent, forget the bonded approach entirely. Move to an unbonded or floating profile, and adjust your minimum pour depth from 25mm up to a safer 30mm thickness.
Priming, Laser Leveling, and Joint Management
Once the substrate is clean, the next steps are to manage suction, establish your datum, and protect the pour from structural movement:
- Multi-Coat Priming – Apply a minimum of two coats of SBR or acrylic primer. Dilute the first coat 3:1 (water to primer) to penetrate the concrete pores, followed by a 1:1 or neat second coat. This seals substrate suction
- Laser Datum Grid – Use a rotating laser level to find the highest point of the old slab. Measure your minimum 25mm thickness from this benchmark. Set mechanical leveling tripods across the floor on a 2m grid, adjusting each height pin to the laser datum to guarantee an SR2 finish tolerance.
- Isolation and Joint Mirroring – Fix an 8mm polyethylene foam expansion strip around the room perimeter to absorb lateral thermal movement. Next, map and mirror every active expansion or day joint from the old subfloor directly up into the new screed using rigid movement profiles or saw-cuts within 24 to 48 hours of curing to prevent reflective cracking.
How We Pump, Dapple, and Control the Cure
At this point, our pumping team takes over. We control the flow and the drying rates directly from our truck to make sure that the fresh layer fuses perfectly with your old slab:
- Our On-Site Flow Testing – First we run a slump test on the material using a standard 50mm x 40mm flow ring on a clean, level surface. We target a strict flow diameter between 230mm and 260mm. If the mix is too thick, it won’t self-level; if it’s too wet, the aggregate will segregate.
- Our Dappling Technique – We pump the material directly to your laser-set tripod pins. As soon as the level is reached, we use our dapple bars to consolidate the screed and release encapsulated air bubbles. We run a heavy, deep pass across the floor area, followed immediately by a light, superficial pass at 90 degrees to smooth out surface ripples
- Setting Your Curing Window – Once the pour is complete you’ll need to seal the space completely for the first 24 to 48 hours. Turn off any ventilation and block direct sunlight to prevent rapid, uneven drying that causes edge-curling at the bond line. After 48 hours, reverse this and open windows to maximise the cross-ventilation. Don’t commission underfloor heating until at least 7 days post-pour.
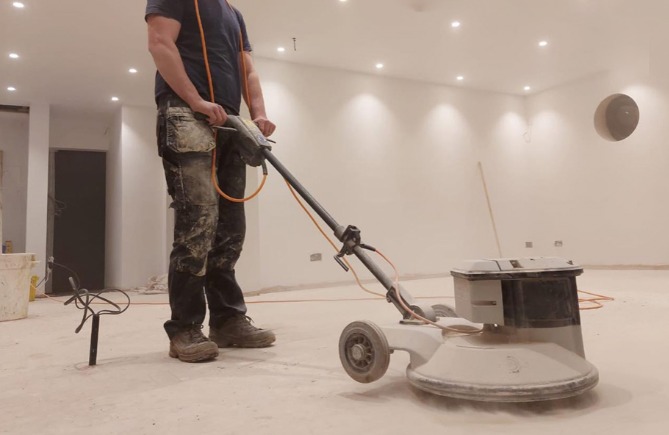
Laitance Sanding and the Technical Quick-Reference Table
You can’t lay your floor finishes directly onto a newly cured flow screed. This is because laitance forms on anhydrite screed as it dries; this needs to be mechanically sanded 7 to 11 days after the pour. If you leave the laitance, your tile adhesive or floor primer will bond to a loose crust rather than the solid screed.
To ensure your installation complies fully with UK building codes, use the quick-reference table below to cross-check your site setup:
Technical Parameter | Bonded Profile (Direct to Old Floor) | Unbonded Profile (Over DPM Membrane) | Floating Profile (Over Insulation/UFH) |
Minimum Depth | 25mm | 30mm | 35mm (Commercial) / 40mm (Domestic) |
Governing Standard | BS 8204 Part 7 | BS 8204 Part 7 | BS 8204 Part 7 |
Surface Regularity | SR2 (≤5mm gap under 2m bar) | SR2 (≤5mm gap under 2m bar) | SR2 (≤5mm gap under 2m bar) |
Initial Curing Window | 24 to 48 Hours (No Drafts) | 24 to 48 Hours (No Drafts) | 24 to 48 Hours (No Drafts) |
Moisture Limit for Floor | <75% RH / 0.5% Carbide Test | <75% RH / 0.5% Carbide Test | <75% RH / 0.5% Carbide Test |
FAQs – How to Screed Over an Existing Floor
Here are four questions we regularly hear from our clients.
Can I leave my old skirting boards on the wall when you pump the screed?
No. Pumping liquid screed directly against timber skirtings bridges the isolation barrier, meaning the floor will lock solid against your walls. This prevents natural thermal expansion and causes the screed to edge-crack or buckle. You must be able to run 8mm polyethylene foam expansion strips directly against the bare structural brickwork or plasterboard.
Can I lay resin directly over a calcium sulphate flow screed?
No, not directly; you’ll need a barrier. Resin forms a non-breathable seal. If there is any residual moisture in the screed, it gets trapped, destroying the bond and causing the resin to blister. The screed should be mechanically sanded, dried to under 0.5% moisture mass, and sealed with a specialised epoxy primer before the resin layer is laid down.
The old floor has working electric underfloor heating mats. Can you pour straight over them?
Yes, but you must run a physical pressure and continuity test on the heating cables immediately before and after our pour. Electric mats must be well pinned down to the subfloor so they don’t float to the surface of the screed. Additionally, because we need a minimum 25mm of material above the heating elements for a bonded installation, your total pour depth will increase to accommodate the thickness of the cable profile.
Why Choose Buxton Flow Screeds?
We built our business on getting the technical steps right on every single project. If you prefer to leave the mixing, slump testing, and high-pressure pumping to UK specialists with decades of site history, let our team handle the pumping for you.
Book your site pour – Call our team to talk through your project or fill in our online form to get your free quote – 020 3369 3396 or 07590 625100


