

Liquid Screed Aftercare
Once Your Liquid Screed is Poured – Your Aftercare Checklist
Watching your liquid screed being poured is the first step, but it’s what you do after the screeders leave that will guarantee a perfect result. The correct liquid screed aftercare is important, so you need information you can trust to make sure that it’s done properly. This guide gives you a simple, step-by-step checklist for the days and weeks ahead. We’ll go through drying times, preparing the surface for floor coverings, and getting your underfloor heating running smoothly, so you know exactly what to do and when.
For more than 20 years, the Buxton Flow Screeds team has been helping builders, renovators, and DIYers achieve flawless floors. We’ve created this guide because we don’t think that our job isn’t finished until you’re ready to lay your floor covering.
Your Week-by-Week Guide to Curing and Drying
Now we’ll go through the aftercare process. Timing is critical with liquid screed, so we’ve broken it down into a timeline for you to follow. Keep to this plan and you’ll be on track for a floor that’s ready for its final covering.
1. Straight After the Pour (The First 2 Days)
This is the easy bit – simply leave it be! Your new screed needs to cure without your interference.
- No walking – Keep off the floor for at least 24-48 hours.
- Protect it – Close windows and doors to stop drafts and keep the temperature stable if you possibly can. The screed contains all the water it needs to cure, so don’t try to speed things up.
2. Getting the Dry Started (Day 3 Onwards)
Now you can start to make adjustments to the drying environment.
- Introduce ventilation – Open windows to allow air to move across the screed’s surface. This carries the moisture away.
- Hold off on dehumidifiers – A dehumidifier is too much at this early stage. Wait at least a week before using one.
3. An Essential Task (Between Day 7 and Day 14)
It’s time to you prepare the surface of your screed floor.
- What is laitance? – It’s a fine crust that forms on the top of the screed as it cures.
- How to remove laitance (necessary) – You’ll need to lightly sand the entire surface. This is an important step because it allows the remaining moisture to escape and creates the perfect rough surface (key) for floor adhesive.
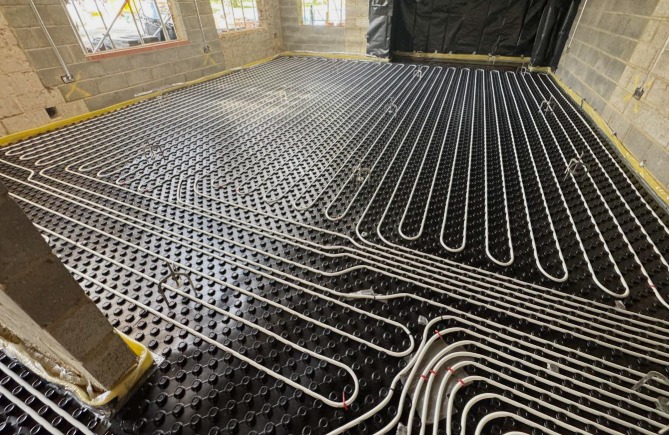
4. If You Have Underfloor Heating (From Day 7)
You can use your UFH system to speed up the final drying stage.
- Start low and slow – Begin by running the heating at a low flow temperature (20-25°C) for a few days.
- Gradually increase – Slowly raise the temperature over the next four to five days to its maximum operating level. This gentle heat will push out the last of the moisture.
5. The Final Check (Before Laying Your Floor)
Don’t cut this corner – the final, and most critical, step is a moisture test using a hygrometer. This is what ensures your floor is dry enough for its final floor covering.
How long does it take for a screed floor to dry? You can get a good indication by looking at 3 things. Firstly, the thickness of the screed – any depth over 40mm will need more time to dry fully. Secondly, using your underfloor heating to commission the floor will actively and efficiently remove the final residual moisture.
Finally, if you’re working to a tight schedule, using a quick-drying anhydrite screed blend is a great choice as it’s designed to reduce that waiting period.
Ask a Screeder – Your Top Aftercare Questions
We know you’ve probably got a few more questions as you move towards the final stages. Here are our answers to questions we hear regularly.
1. What’s the right way to lay flooring onto new liquid screed?
This is a multi-step process that starts after your moisture test. First, the laitance must have been fully removed by sanding, and the resulting dust thoroughly vacuumed away. Next, you’ll need to apply the correct primer. For anhydrite (liquid) screeds, you need an acrylic or water-based epoxy primer to create a barrier between the gypsum-based screed and any cement-based adhesives, preventing a chemical reaction. Once the primer is dry, you can go ahead with tiling or flooring, using the adhesive recommended by the manufacturer.
2. Our project is delayed. How do we protect the screed until the floorers arrive?
This happens all the time. Once the screed can take light foot traffic, and especially after it’s fully dry, you need to protect it from heavy loads, impacts, and spills from other trades. We recommend laying down strong, breathable protection boards and ensuring they are well-taped. This stops damage but doesn’t trap moisture in the screed.
3. Can liquid screed be force dried with heaters?
We wouldn’t advise it. It may seem like a good way to speed things up, but applying aggressive, direct heat (especially from propane burners) will cause damage. It forces the surface to dry much faster than the body of the screed, leading to stress, cracking, and potential failure.
4. Will any floor adhesive work with liquid screed?
No. It’s important to use an adhesive that is compatible with calcium sulphate or anhydrite screeds. Most manufacturers offer specific ranges for this. Using a standard cement-based tile adhesive without first applying the correct primer can cause a chemical reaction with the screed, leading to a complete failure of the bond over time. Always check the adhesive’s technical data sheet.
Liquid Screed Aftercare – Bringing It All Together
Don’t think of liquid screed aftercare as an extra step – it’s an essential part of the installation process that guarantees a flawless result. By following our professional guide to drying, surface preparation, and testing, you now have everything you need to manage the weeks after the pour.
Planning a new project or have a question about our services? Call our screeding team today to talk to us – 020 3369 3396/ 07590 625100


