
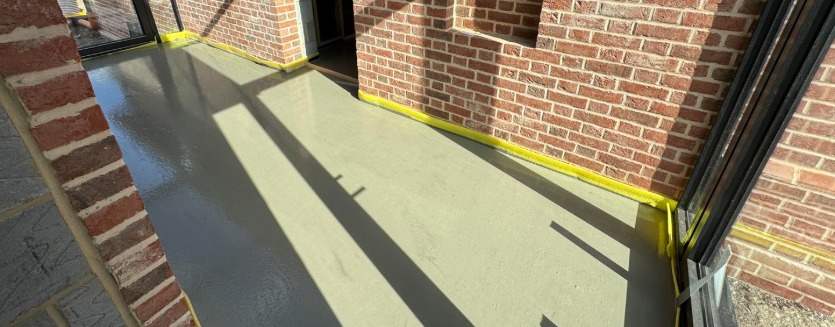
Can You Screed Over Old Concrete?
Preparing Old Concrete for Liquid Screed
Can you screed over old concrete? Yes, you absolutely can, but it’s a job where preparation is everything. If your old concrete base has cracks, is uneven, or is contaminated with oil or paint, your new screed won’t bond sufficiently, so you’ll end up with cracks and lifting. In order to achieve a flawless, long-lasting finish you need the right prep work, and in this guide, we’ll detail the exact steps you should take.
We’re Buxton Flow Screeds, and for over two decades now, we’ve been supplying and installing liquid screed. We’ve seen every kind of problem an old substrate can throw at you, so you can trust the info we’re sharing is practical, reliable, and based on 20+ years of hands-on experience.
Matching the Right Screed to Your Renovation
The main reasons for screeding over old concrete are either to level-up an uneven, patchy floor, or to upgrade the entire space with a perfect finish, durability, and/or underfloor heating.
When you just need to level the floor:
To level an uneven concrete base, a standard levelling compound is your best option. This is a cementitious product you mix and pour, designed to smooth out imperfections across the slab in a relatively thin layer. It’s a reliable fix for taking out the low spots and creating a flat, solid base for the final floor covering.
When you need performance (especially UFH):
If you’re looking for a high-spec finish, or if UFH is part of the plan, a self-levelling liquid screed is the definitely what you should go for. A liquid screed is designed for just this kind of job. It’s pumped in and flows perfectly flat, giving you a strong, durable floor. Its huge benefit for underfloor heating installation is that it completely encases the heating pipes. This total contact means heat transfers really efficiently, giving you a warm, responsive floor – the equivalent of a giant radiator.
The Essential Prep – A Step-by-Step Guide to Preparing Your Substrate
This is the most important part of the job. Whether you’re using a levelling compound or liquid screed, the final floor is only as good as the bond between the concrete and the screed. Neglecting or rushing your prep will cause the new layer to delaminate, crack, or lift. Follow these steps for a guaranteed bond.

Equipment Needed – Industrial vacuum cleaner, floor grinder, epoxy resin/concrete repair mortar, buckets, stiff brush, and a suitable acrylic or epoxy primer.
- Deep Clean the Concrete Slab – Start by scraping and sweeping the floor. Then, use an industrial vacuum (not just a site vac) to remove all fine dust and debris. The slab needs to be totally clear so you can see what you’re dealing with.
- Repair Damage and Cracks – If you find any structural cracks, they must repaired using a two-part epoxy resin or a polymer-modified repair mortar. Allow this to cure fully, which could take 12-24 hours (always check the manufacturer’s data sheet). Never screed over a wet repair.
- Remove Contamination & Create a Key – Old slabs can have a residue of paint, oil or adhesive which should be removed. Use a floor grinder or scabbler to abrade the entire surface. This “keys” the concrete, by creating a rough surface for the new layer to grip onto.
- Final Vacuum – Grinding creates a lot of fine dust. Vacuum the entire area again, and again, until you’re sure that you’ve picked up all the dust. Any that gets left behind will stop the primer from bonding correctly.
- Apply the Primer – Concrete is porous, and a primer seals the surface, stopping the screed from drying too fast, and preventing “outgassing” (when air bubbles rising through the mix). Make sure that you apply the right primer for your chosen screed (usually an acrylic primer) with a brush or roller.
Allow the primer to dry completely, which can take anything from 1 hour to overnight, depending on the primer and site conditions. Your floor is only ready when the primer is fully cured (tacky, but not wet).
Liquid Screed Application – Your Technical FAQs
Thorough prep is the foundation, and then the pour itself must meet technical standards for a strong floor that will stand the test of time. Liquid screeds are high-performance products that behave differently from traditional sand and cement. Here are the technical questions our installers get asked regularly by builders and renovators before a pour.
1. How thick does liquid screed need to be over old concrete?
It depends on the system you are installing. If you are bonding the screed directly to the prepared concrete slab, you need a minimum depth of 25mm. If you’re laying the screed “floating” (over insulation and a membrane) or incorporating underfloor heating (UFH), the depth should be greater. For UFH, we recommend a minimum of 50mm total depth, which provides 20-25mm of cover over the pipes.
2. How long before you can walk on liquid screed?
Liquid screed sets fast. In most cases, you can introduce light foot traffic in 24 to 48 hours. “Light traffic” means people walking on it – it doesn’t mean loading palettes or heavy equipment; you’ll need to wait 7 days for that.
3. Can I mix and pour liquid screed by hand, or does it need a pump?
Liquid screed must be pump-applied. It’s delivered in a truck mixer and pumped directly to the area, ensuring the entire batch is consistent, perfectly mixed, and laid rapidly.
4. When should I commission the underfloor heating after a screed pour?
The screed needs time to cure first. We recommend waiting 7 full days. After this, you can start controlled commissioning. Set the water temperature low (around 20∘C) and increase it gradually (no more than 5∘C per day). This gradual process forces the remaining moisture out of the slab slowly and safely, so you avoid thermal shock and the cracking that rapid heating would cause.
Want a Guaranteed Result? Let Us Handle the Prep and Pour
Screeding an old slab is a job where the prep and pour need to be technically perfect. And the easiest way to guarantee long-term strength is to use experienced screeders. At Buxton Flow Screeds, our 20+ years of experience means we know exactly how to prepare any substrate. We take care of everything, from the initial grinding and repairs to the final pump application of your liquid screed.
Ready to discuss your substrate? Call our team for expert advice and a no-obligation quote – 020 3369 3396 or 07590 625100


