

Step-by-Step Guide to Using Self-Levelling Compound
Achieving a Smooth, Even Surface – Pro Tips for Self-Levelling Success
Self-levelling compound sometimes gets a bad rap. DIYers and renovators sometimes find it doesn’t perform as they expected it to, or that it’s more challenging to apply than they thought. In our experience, issues usually stem from the prep of the subfloor or overestimating how long you’ve got before it starts to set. That’s why we’re offering our step-by-step guide to using self-levelling compound, so you can level up your floors with confidence.
The team at Buxton Flow Screeds has been supplying and installing self-levelling compounds for years, from garage conversions to smoothing out old, uneven kitchen subfloors. Our hands-on experience means we’re a reliable source to offer practical guidance if you’re levelling up a floor for the first time.
Getting Started – Your Toolkit and Step-by-Step Application
Right, let’s get going on applying the self-levelling compound. First tip – Before you even think about mixing, make sure you’ve got everything you need laid out and ready to go. Trust us, once that compound is mixed, the clock is ticking, and you’ll want to work fast and efficiently.
- Surface Preparation Gear – Before anything else, your floor needs to be really clean. For this you’ll needs floor scrapers (for any stuck-on bits), a wire brush (for tougher patches), and an industrial vacuum.
- Depth Setting Pins/Tripods – Before you pour, you need to know how thick the compound needs to be. These little adjustable pins or tripods are set to your target depth. This way, as you pour and spread, you’ve got a clear visual guide, so you know you’re hitting a consistent level everywhere.
- Clean Mixing Buckets/Tubs – They have to be clean. Any old cement, or dirt in your bucket can contaminate your mix, leading to lumps or a weak finish. You want a couple of buckets – one for measuring water precisely, and one for the compound itself.
- Heavy-Duty Mixing Paddle (for Drills) – To mix self-levelling compound properly, you need a mixing paddle that attaches to a powerful, low-speed drill. It needs to be able to agitate a thick, cementitious mix, so that every grain of powder is wetted out without introducing loads of air.
- Spiked Roller – Once your compound is down and spread, roll this gently and methodically across the wet compound. It helps release air bubbles, preventing pinholes and giving you a denser, stronger, and smoother surface.
- Smoothing Trowel/Spreader – The compound is designed to self-level, but it can be helped along to all the right places, especially into corners or around obstacles. A long-handled smoothing trowel or a specific self-levelling spreader helps you guide the material, ensuring it’s the right depth.
Step 1. Prep – Clean, Prime, and Pristine!
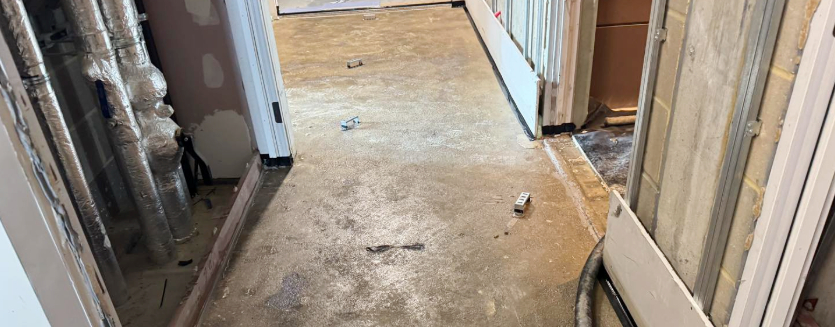
This first prepping step is the foundation for everything that follows. Don’t even consider mixing the compound until this is done.
- Initial Clean-Up – Get rid of anything loose on that floor – old plaster, bits of adhesive, flaky paint – you name it. Scrape it, sweep it, get it all up. Give it a good initial vacuum too.
- Time to Prime – If you’re new to this, primer seals the subfloor. Why bother? Because it stops the porous floor from sucking the water out of your self-levelling compound too quickly (which weakens it and stops it flowing properly). It also improves the bond between the old floor and your new level layer. Let it dry completely.
- Final Vacuum – Once your primer is dry take your vacuum cleaner – nozzle attachment on – and go over that primed floor obsessively. Any speck of dust or grit that’s settled while the primer dried can create a pimple or a weak spot in your finish.
Step 2. Pre-Mixing Prep & Secure Boundaries
Before we mix, we need to get organised and have all our boundaries are secure.
- The Mixing Station – Get your mixing area set up. This means bags of compound close by (but not where they can get splashed before mixing!), your super-clean buckets (one for water, one for mixing), your drill and paddle ready to go, and your water measured out exactly.
- Containing the Compound – This liquid is designed to find its own level, and it’ll also find any tiny gap to seep through. Doorways are obvious escape routes, so use damming strips. What about pipes? Use pipe collars or wrap them tightly with waterproof tape and plastic. Look for any gaps at the base of skirting boards too.
- Depth Pin Precision – Grab your depth setting pins or adjustable tripods. These ensure you get the level you need. Place them across the floor – like a grid. Each pin needs to be set so its top sits precisely at your desired finished floor height. These pins are your guides, telling you exactly how much material to aim for in each spot.
Step 3. The Mix – Precision, Power, and Timing
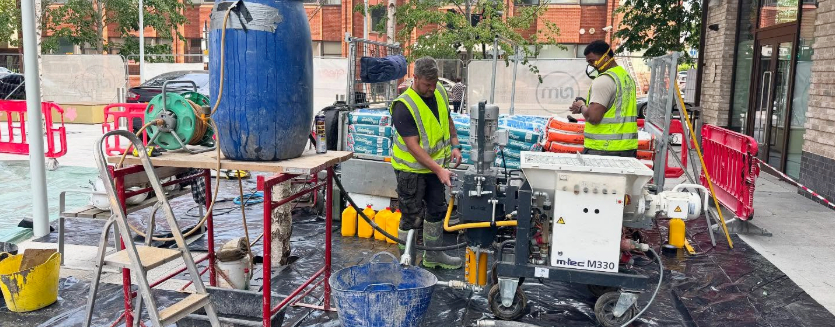
Get this right, and you’re on your way to a perfect floor.
- Water First, Powder Second – Take your clean mixing bucket. Water first, always. Pour in the exact amount of clean, cold water specified on the compound bag.
- The Gradual Introduction – Now, start your heavy-duty, low-speed drill with the mixing paddle before you add the powder, or have it ready to go immediately. Begin adding the self-levelling powder to the water gradually while the paddle is spinning. Keep adding steadily until the whole bag is in.
- Smooth & Consistent – Mix thoroughly for the time stated on the bag – usually 2-3 minutes. Keep the paddle moving, getting right into the bottom and sides of the bucket to ensure every particle is wetted out. The mix should look like pancake batter or single cream. No dry streaks, no lumps.
- The Workability Clock is Ticking – Once it’s mixed, that compound has a limited workable time – typically around 20 minutes but check your product instructions. This is why we got everything else ready beforehand! Don’t try to ‘stretch’ it by adding more water if it starts to thicken. Mix, pour, spread.
Step 4. Pouring & Coaxing
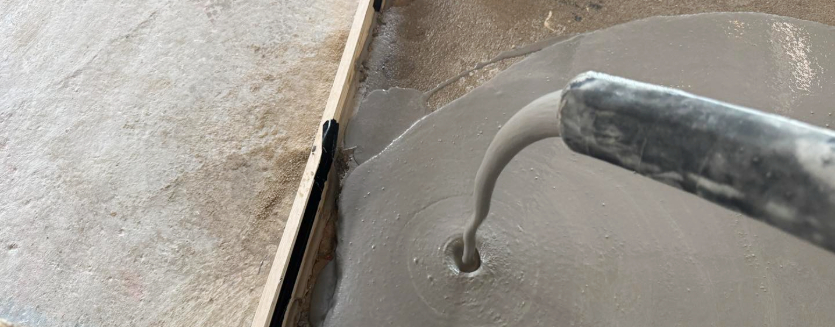
Now it’s time to get that compound onto the prepared subfloor. We need to get this pour right.
- Furthest Point First – Start pouring in the area furthest from your exit point. Pour in long, even ribbons or pools. Don’t just dump the whole bucket in one spot unless it’s a tiny area.
- Nudging it Home – This stuff is self-levelling, but it often needs a bit of help. Use your smoothing trowel or spreader with gentle, sweeping motions. Don’t force it. If you’re doing a large area in sections.
- Work Smart, Work Clean – Keep a wet edge if you’re doing multiple batches. This means pouring fresh mix into the still-wet edge of the previous pour within about 10 minutes. This helps it all meld together into one slab.
Step 5 – The Spiked Roller
Your self-levelling compound is on the floor and starting to find its level. But before it starts to cure, we need to get rid of those tiny air bubbles.
- The Working Window – You use your spiked roller when the compound is freshly laid and still very fluid – typically in the first 10 minutes after spreading. You need to be able to see the spike marks momentarily fill back in with compound as you roll.
- The Spikes at Work – Roll the spiked roller gently across the entire surface. The idea is to create tiny pathways for any trapped air to escape. You should see little air bubbles rising and bursting as you go.
- Thorough and Methodical – Cover every square inch. A couple of passes, perhaps at right angles to each other, will usually do the trick. This process improves the density and smoothness of your floor.
Step 6. The Waiting Game – Curing
Now, the self-levelling compound needs time to cure. This stage is all about patience and understanding what’s happening.
- Let it Be – Once you’ve finished, leave the area completely alone for at least 2-4 hours (your product instructions will give the precise time). During this period, it’s hardening and gaining strength. Avoid any foot traffic, vibrations, or even strong air currents across the surface.
- Walkable vs. Workable – Know the Difference – After a few hours, it might feel hard enough to walk on carefully (again, check the instructions). But ‘walkable’ is very different from ‘ready for floor coverings.’ The compound is still releasing moisture and gaining its full compressive strength. Typically, wait 24 hours as a bare minimum for most finishes, longer for thicker applications or sensitive flooring.
- Signs of a Successful Cure – A fully cured floor will look uniform in colour and texture. It will be hard to the touch – you shouldn’t be able to easily indent it with a fingernail.
Step 7: The Wrap-Up – Tool Clean-Up & Site Tidy
Cleaning up self-levelling compound needs to be done straight away.
- Clean Tools Immediately – That compound starts hardening quickly. Take your buckets, mixing paddle, spreader, and spiked roller and clean them with water and a brush while everything is still wet.
- Washing & Disposal – Wash your tools where the residue won’t block drains or harm your garden. Sweep up any dry powder spills too.
Beyond the Guide – Next Steps and Expert Support
That’s it – the whole process – from a problematic subfloor to a smooth, level surface ready for its final finish. Now, the only thing left is to choose that final flooring and enjoy your perfect floor!
At Buxton Flow Screeds, we don’t just supply premium self-levelling compounds – we offer decades of hands-on experience. For reliable advice unique to your renovation or self-build, or to order your materials directly, contact us today on 020 3369 3396 or 07590 625100


